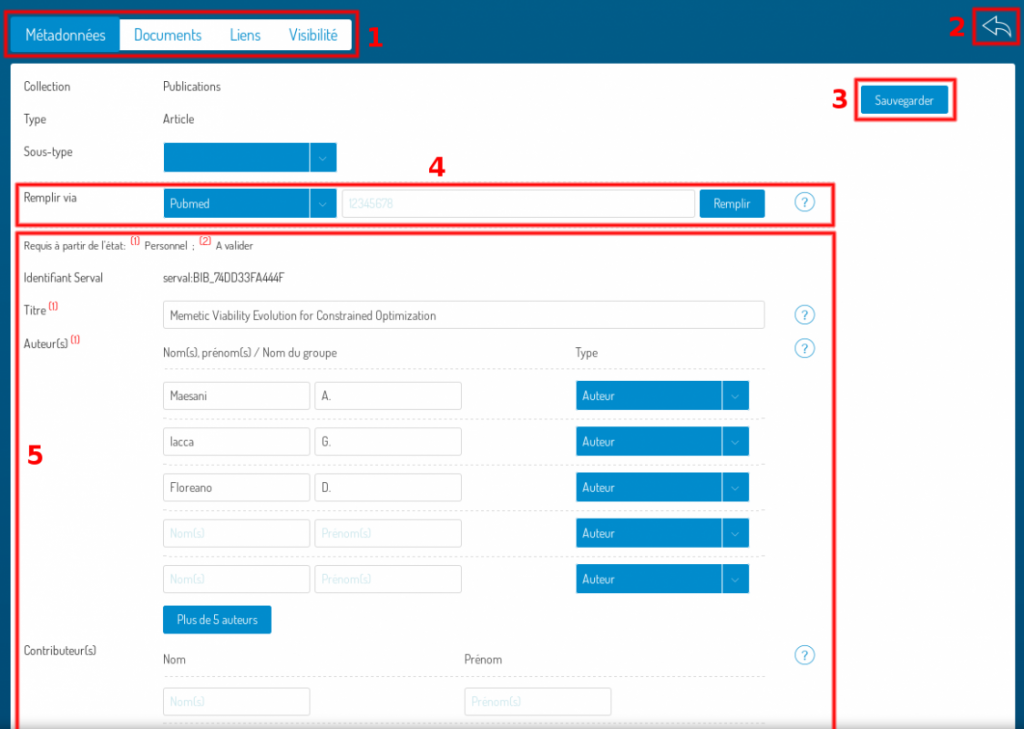
- Selected editing step, Metadata in this example, and navigation to another stepRetour à la recherche
- Back to search
- Save changes
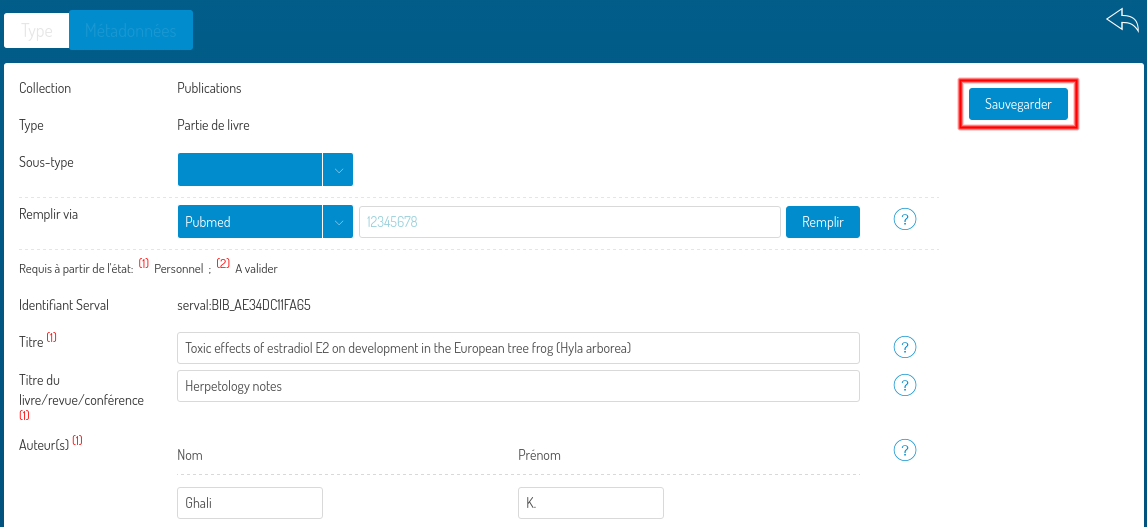
- Filling aid
- metadata
Filling the form from an external source
Fill via (4.), will fill the metadata form from various external sources (eg: Pubmed, DOI). Choose the source that will be used in the list and enter the identifier corresponding to your publication in the chosen source. Then click on Fill. If you have already entered values ??in your form, the value entered in a field will only be replaced if a new value exists in the values ??from the external source.

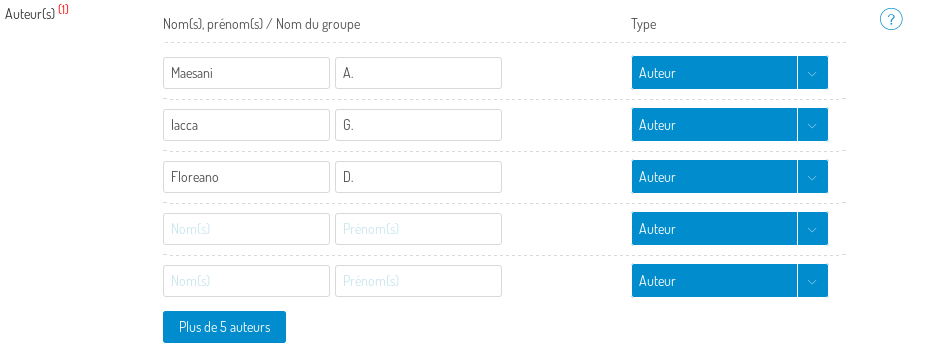
If your publication has fewer than five authors, it is recommended that you enter their names and first names in separate fields, which is easy to use, as in the example below.
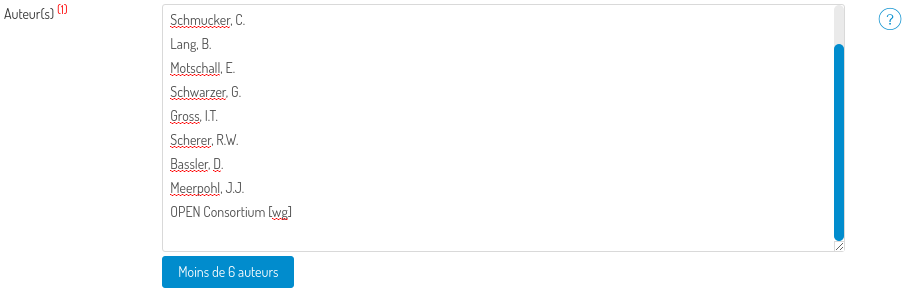
On the other hand, for publications with more than 5 authors, a text entry in a single, more flexible text field is preferred. You will then have to enter one author per line, respecting the format “name, first name”. For the author field, which sometimes allows to enter a working group, the name followed by “[wg]” must be entered.
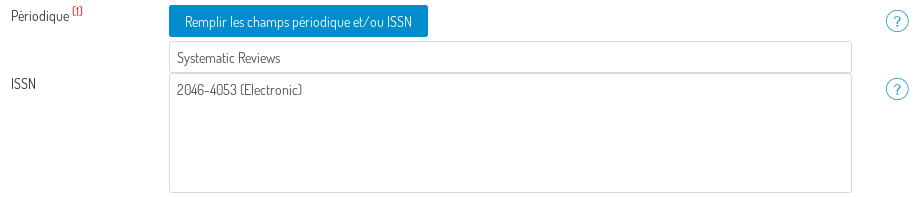
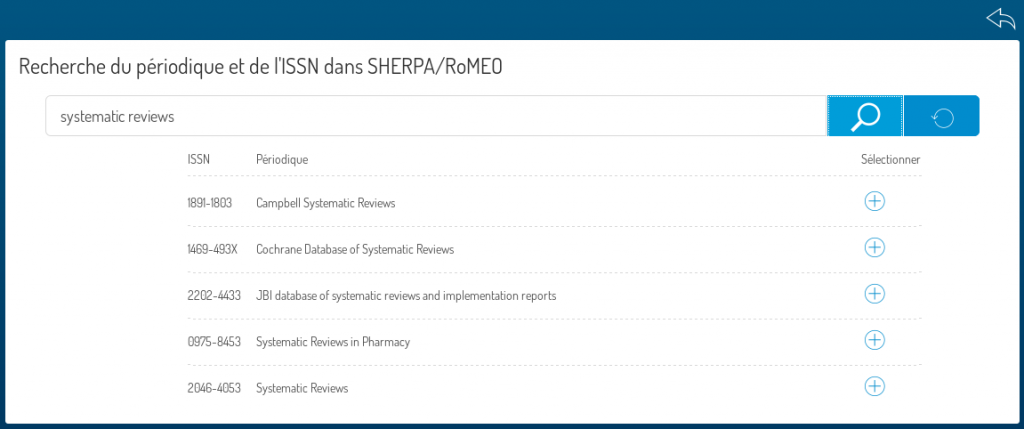
Help in entering a journal
The Fill Periodic and / or ISSN button will allow you to fill out the Periodic and ISSN fields from Sherpa / RoMEO. To begin, click on it to go to the periodic search screen.
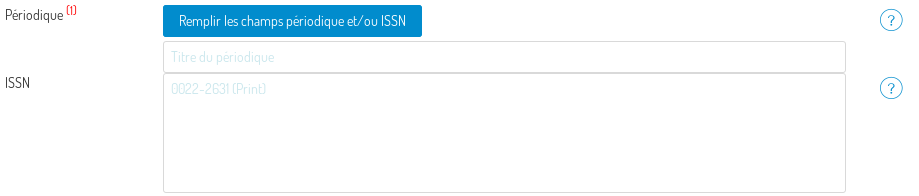
You can either enter the journal title or the ISSN in the search field. Then click  to start the search. You can then select the periodical in the results obtained by clicking on the corresponding
 .
.
The Periodic and ISSN fields will then be filled in.