The major generative artificial intelligence platforms (Microsoft Copilot, ChatGPT, Google Gemini, Claude) now offer the ability to create custom assistants. These are preconfigured agents, specialized for a particular topic, tone, or dataset, that can be reused at will without having to restate instructions for each conversation.
This article presents the usefulness of these assistants and then shows how to configure them on four platforms. Since interfaces change frequently, we focus on the common logic rather than on each individual button.
UNIL reminder: Only Microsoft Copilot is authorized at UNIL for processing institutional data (see the dedicated page). Other platforms (ChatGPT, Gemini, Claude) should only be used with non-confidential, already public data. Do not upload personal data, sensitive information, or data subject to official secrecy.
What is a custom AI assistant for?
A custom assistant allows you to lock in a behavior: you define the agent’s role, tone, rules, and sources once and for all. Then, each new conversation starts with these parameters already in place. Here are some concrete use cases:
- Academic writing assistance. An assistant familiar with APA standards that rephrases text into academic English and checks citation consistency.
- Administrative support. An agent trained on internal procedures (regulations, forms, FAQs) capable of answering common staff questions.
- Qualitative data analysis. An assistant that codes interviews according to a predefined analytical framework and extracts recurring themes.
- Course preparation. An agent specialized in a given discipline, capable of generating exercises, multiple-choice quizzes, or summaries tailored to students’ level.
- Scientific monitoring. An assistant that analyzes uploaded PDF articles and produces structured summaries.
The main benefit: saving time by avoiding the repetition of the same instructions, and ensuring consistency in responses from one session to the next.
The common principle: three key elements
Whatever the platform, creating an assistant is based on three fundamental components:
- Instructions (“system prompt”). The heart of the assistant. Here you describe its role, tone, behavioral rules, and the limits of its responses. This text is injected before each conversation.
- The knowledge base. Files or URLs that the assistant can consult to enrich its responses with your own data. Accepted formats vary by platform.
- Capabilities and tools. Depending on the platform: web browsing, image generation, code execution, etc.
1. Microsoft Copilot: Agents
Access: m365.cloud.microsoft → sidebar → Agents section → +Create button.
UNIL note: Microsoft 365 Copilot Chat is currently the only AI language model authorized at UNIL for general use. Data is protected within UNIL’s Microsoft tenant (same security level as OneDrive, Teams, or Outlook). Prompts and responses are not used to train the model. Please note, however, that personal data, sensitive information, or data subject to official secrecy should not be entered. Learn more: UNIL FAQ on Copilot.
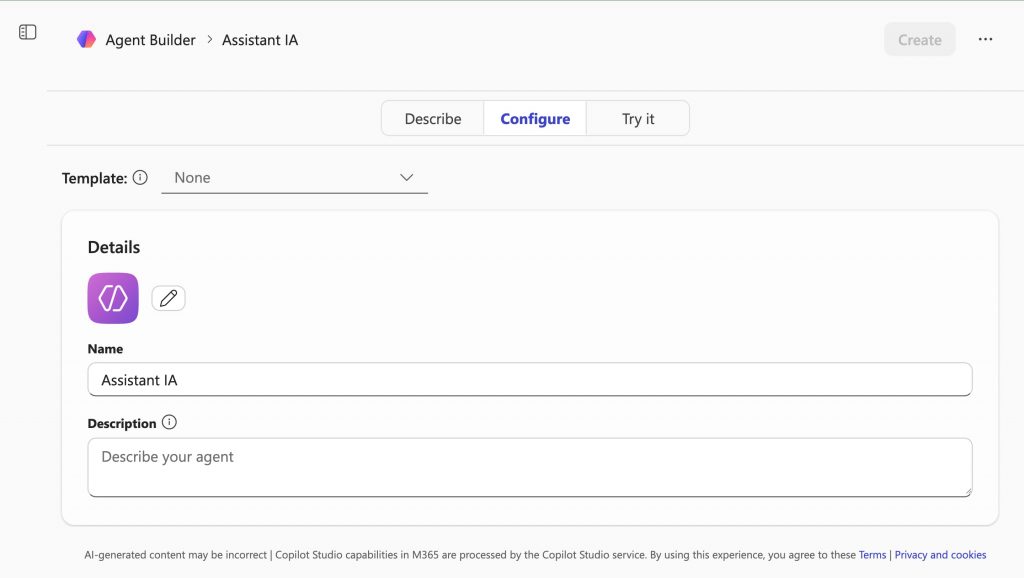
Microsoft calls its custom assistants “Agents.” You create them using the built-in Agent Builder tool, which offers three tabs: Describe (AI-assisted conversational creation), Configure (manual setup), and Try it (real-time testing). Preconfigured templates are also available. Saving is automatic.
The Configure tab presents the following fields:
- Name and Description. Identification of the agent.
- Instructions. Free-text field where you describe the expected behavior (role, tone, rules, restrictions).
- Starter prompts. Suggested first questions displayed to the user.
Knowledge. The agent can access URLs (up to 25, with a maximum depth of 2 levels), SharePoint sites, or OneDrive files via connectors. Direct file upload is not available in the Agent Builder. A “Only use specified sources” toggle allows you to restrict responses to specified sources only. Web search is integrated by default.
Capabilities. Two tools that can be enabled: “Create documents, charts, and code” (creation of Word, Excel, and PowerPoint files) and “Create images” (image generation). The model is fixed (no choice available). Sharing is done via a shareable link or within the M365 tenant (SharePoint, Teams).
Limitations observed during our tests: the safety filter (RAI) is strict, which prevents certain uses such as role-playing. URLs whose directory structure exceeds two levels of depth are rejected.
Example instructions: “You are an assistant specialized in onboarding new UNIL employees. You answer practical questions (IT access, badge, registration for mandatory training) based exclusively on the provided web pages. You respond in French, in a concise and friendly manner. If the information is not in your sources, you direct the user to the Human Resources department.”
2. ChatGPT: GPTs
Access: chatgpt.com → sidebar → Explore GPTs → + Create button.
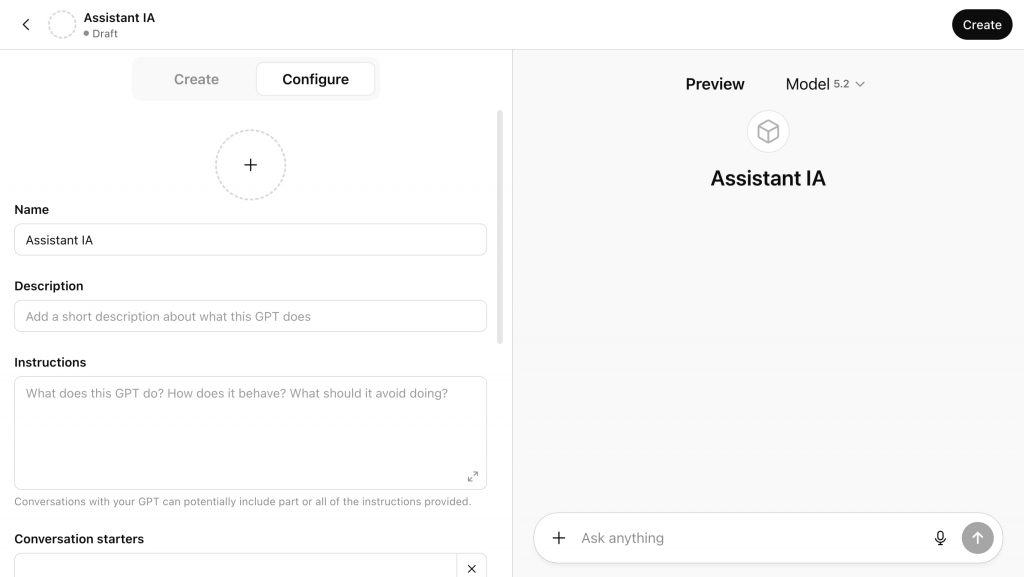
OpenAI refers to its custom assistants as “GPTs.” The editor has two tabs: Create (AI-assisted conversational creation) and Configure (manual setup). Saving is manual (Update button).
The Configure tab offers the following fields:
- Name and Description. Identification of the GPT.
- Instructions. System prompt detailing behavior, tone and rules.
- Conversation starters. Suggested first questions displayed to the user.
- Icon. Upload an image or generate one with AI.
Knowledge. File upload from the device only: up to 20 files, 512 MB per file. Accepted formats: PDF, DOCX, TXT, CSV, images, code. Cloud sources (Google Drive, GitHub) are not supported.
Warning: OpenAI displays a notice indicating that conversations with a GPT may potentially reveal all or part of the content of uploaded files.
Capabilities. Four features that can be enabled: Web Search, Canvas, Image Generation, and Code Interpreter & Data Analysis (Python code execution). It is also possible to create Actions to connect external APIs via an OpenAPI schema.
The GPT allows you to choose the model from several options (including Auto, Instant, and Thinking modes). An Extended thinking mode is also available in the preview panel. Sharing offers three levels: private (Only me), by link, or publication in the GPT Store (public).
Example instructions: “You are the FAQ assistant for the Faculty of Arts. You answer students’ questions based exclusively on the attached study regulations. You cite the relevant articles. If the information is not in the document, you clearly state so and direct the student to the registrar’s office. Your tone is professional and friendly.”
3. Google Gemini: Gems
Access: gemini.google.com → sidebar → Gems section → New Gem button.
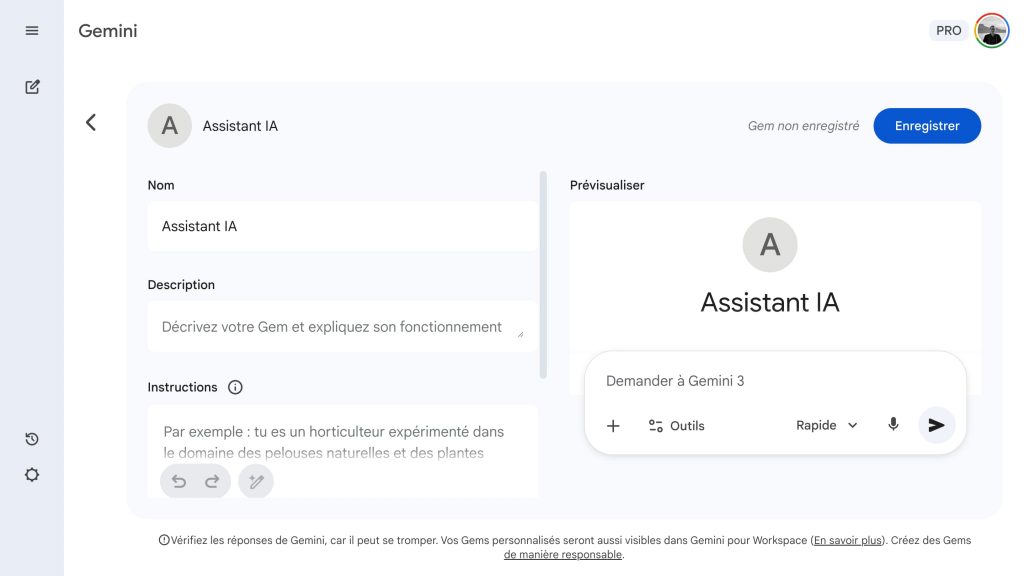
Google calls its assistants “Gems.” The interface is a single form (no tabs), with a preview panel on the right. Saving is manual (“Update” button).
The configuration fields are as follows:
- Name and Description. Identification of the Gem.
- Instructions. Rich text field to define the role and behavior. An “Optimize” button offers an automatic AI-powered rewrite of the instructions.
Knowledge. Five successfully tested methods for adding content: import files, Google Drive (with automatic synchronization of changes), Photos, import code, and NotebookLM. File size and number limits are not specified by Google.
Default tool. A dropdown menu offers several options: create an image, Canvas, Deep Research, create a video, create music, and guided learning. Note: web search is not available in Gems.
The model used is visible in the preview panel but cannot be modified from the configuration. Sharing works like a Google Drive document (shareable link, Google Workspace).
Example instructions: “You are a grading assistant for Bachelor’s theses in social sciences. You evaluate the argumentative structure, quality of written expression, and adherence to guidelines (attached). You provide constructive feedback, structured as strengths and areas for improvement. You never give a numerical grade.”
4. Claude: Projects
Access: claude.ai → sidebar → Projects section → Create project button.
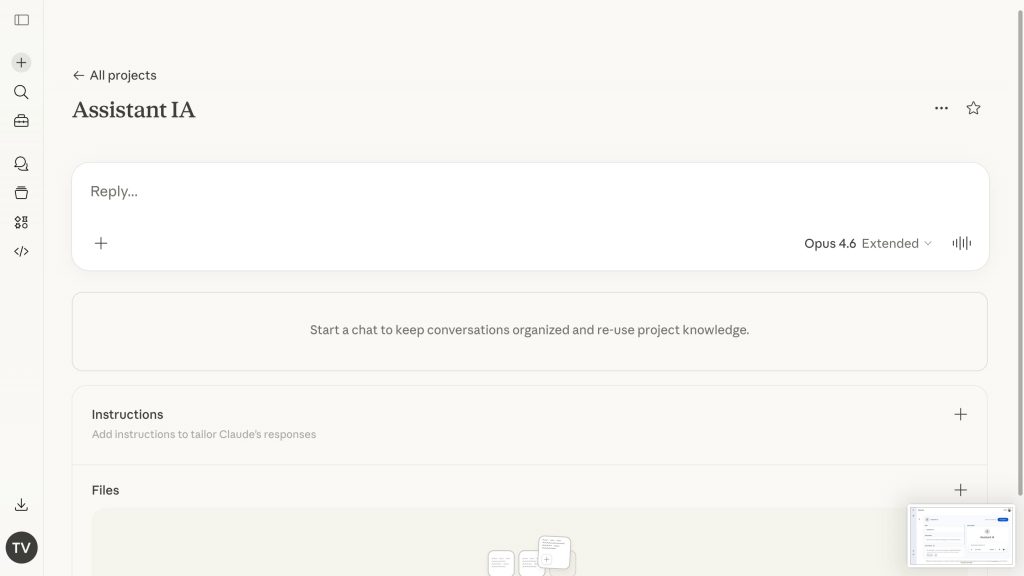
At Anthropic, the equivalent is called “Projects.” Each project groups a set of conversations that share the same instructions and files. The interface is a single screen with collapsible sections. Saving is automatic and immediate.
The configuration fields are as follows:
- Project name. Editable at any time. There is no separate Description field or Conversation starters.
- Instructions. Collapsible section where you define the assistant’s role, tone, and behavioral rules.
Knowledge (Files). Four successfully tested methods for adding content: upload from device (30 MB maximum per file, no visible number limit), add text, import from GitHub, and import from Google Drive. A project capacity indicator (in percentage) allows you to track the space used.
Capabilities. Capabilities are accessible via the “+” menu in the chat: web search (toggle), Deep Research, Extended thinking, custom style (Use style), built-in connectors (Add connectors), voice input, and screen capture. Claude does not offer image generation or Canvas (Artifacts remain available within the conversation).
The choice of model is a distinctive advantage: several options are available (Opus, Sonnet, and Haiku families). Sharing is done via link (no public store).
Example instructions: “You are a research assistant specialized in [discipline]. For each PDF article I submit, you produce a structured reading sheet: full reference, research question, methodology, main results, limitations, and relevance to my thesis topic (described below). You write in academic French.”
Comparison table
To help you choose the platform best suited to your use case, here is a summary of their respective capabilities.
| Criterion | Copilot (Agents) | ChatGPT (GPTs) | Gemini (Gems) | Claude (Projects) |
|---|---|---|---|---|
| Knowledge | URLs only (max 25, 2 levels deep). SharePoint/OneDrive via connectors. | Local files (max 20 files, up to 512 MB per file). PDF, DOCX, TXT, CSV, images, code. | 5 methods: files, Google Drive, Photos, code, NotebookLM. Limits not specified. | 4 methods: files (max 30 MB per file), text, GitHub, Google Drive. No visible limit on the number. |
| Web search | Yes (integrated by default) | Yes (checkbox can be enabled) | Not available in Gems | Yes (toggle can be enabled) |
| Image generation | Yes (Create images) | Yes | Yes (+ video and music) | No |
| Data analysis | Documents, charts, and code (Word/Excel/PowerPoint) | Code Interpreter & Data Analysis (Python) | No (no code interpreter) | No (no native code interpreter) |
| Deep Research | No | No | Yes (selectable as default tool) | Yes (Deep Research) |
| Model selection | No (fixed model) | Yes (several models including Auto, Instant, Thinking) | Partial (visible but not editable) | Yes (several models: Opus, Sonnet, Haiku families) |
| Sharing | Link + SharePoint/Teams (M365 tenant) | Private, link, or GPT Store (public) | Link + Google Workspace | Link (no public store) |
| Unique feature | Native M365 integration, Connectors, auto-save, preconfigured templates | API actions (OpenAPI), Canvas, conversation starters, extended thinking, public GPT Store. | Multimedia (video, music), 5 Knowledge sources, “Optimize” button, guided learning. | Extended thinking, wide model selection, auto-save, custom style, screenshots, voice input |
Tips for writing effective instructions
The quality of your instructions determines the effectiveness of the assistant. Here are the essential principles:
- Define a clear role. “You are an assistant specialized in [field] intended for [target audience].”
- Specify the tone. Formal, educational, concise, accessible… depending on your audience.
- Set boundaries. What the assistant should do and what it should not do.
- Provide examples. One or two examples of expected questions and answers significantly help the model.
- Structure your instructions. Use sections or numbered lists for greater clarity.